Drawing Tools


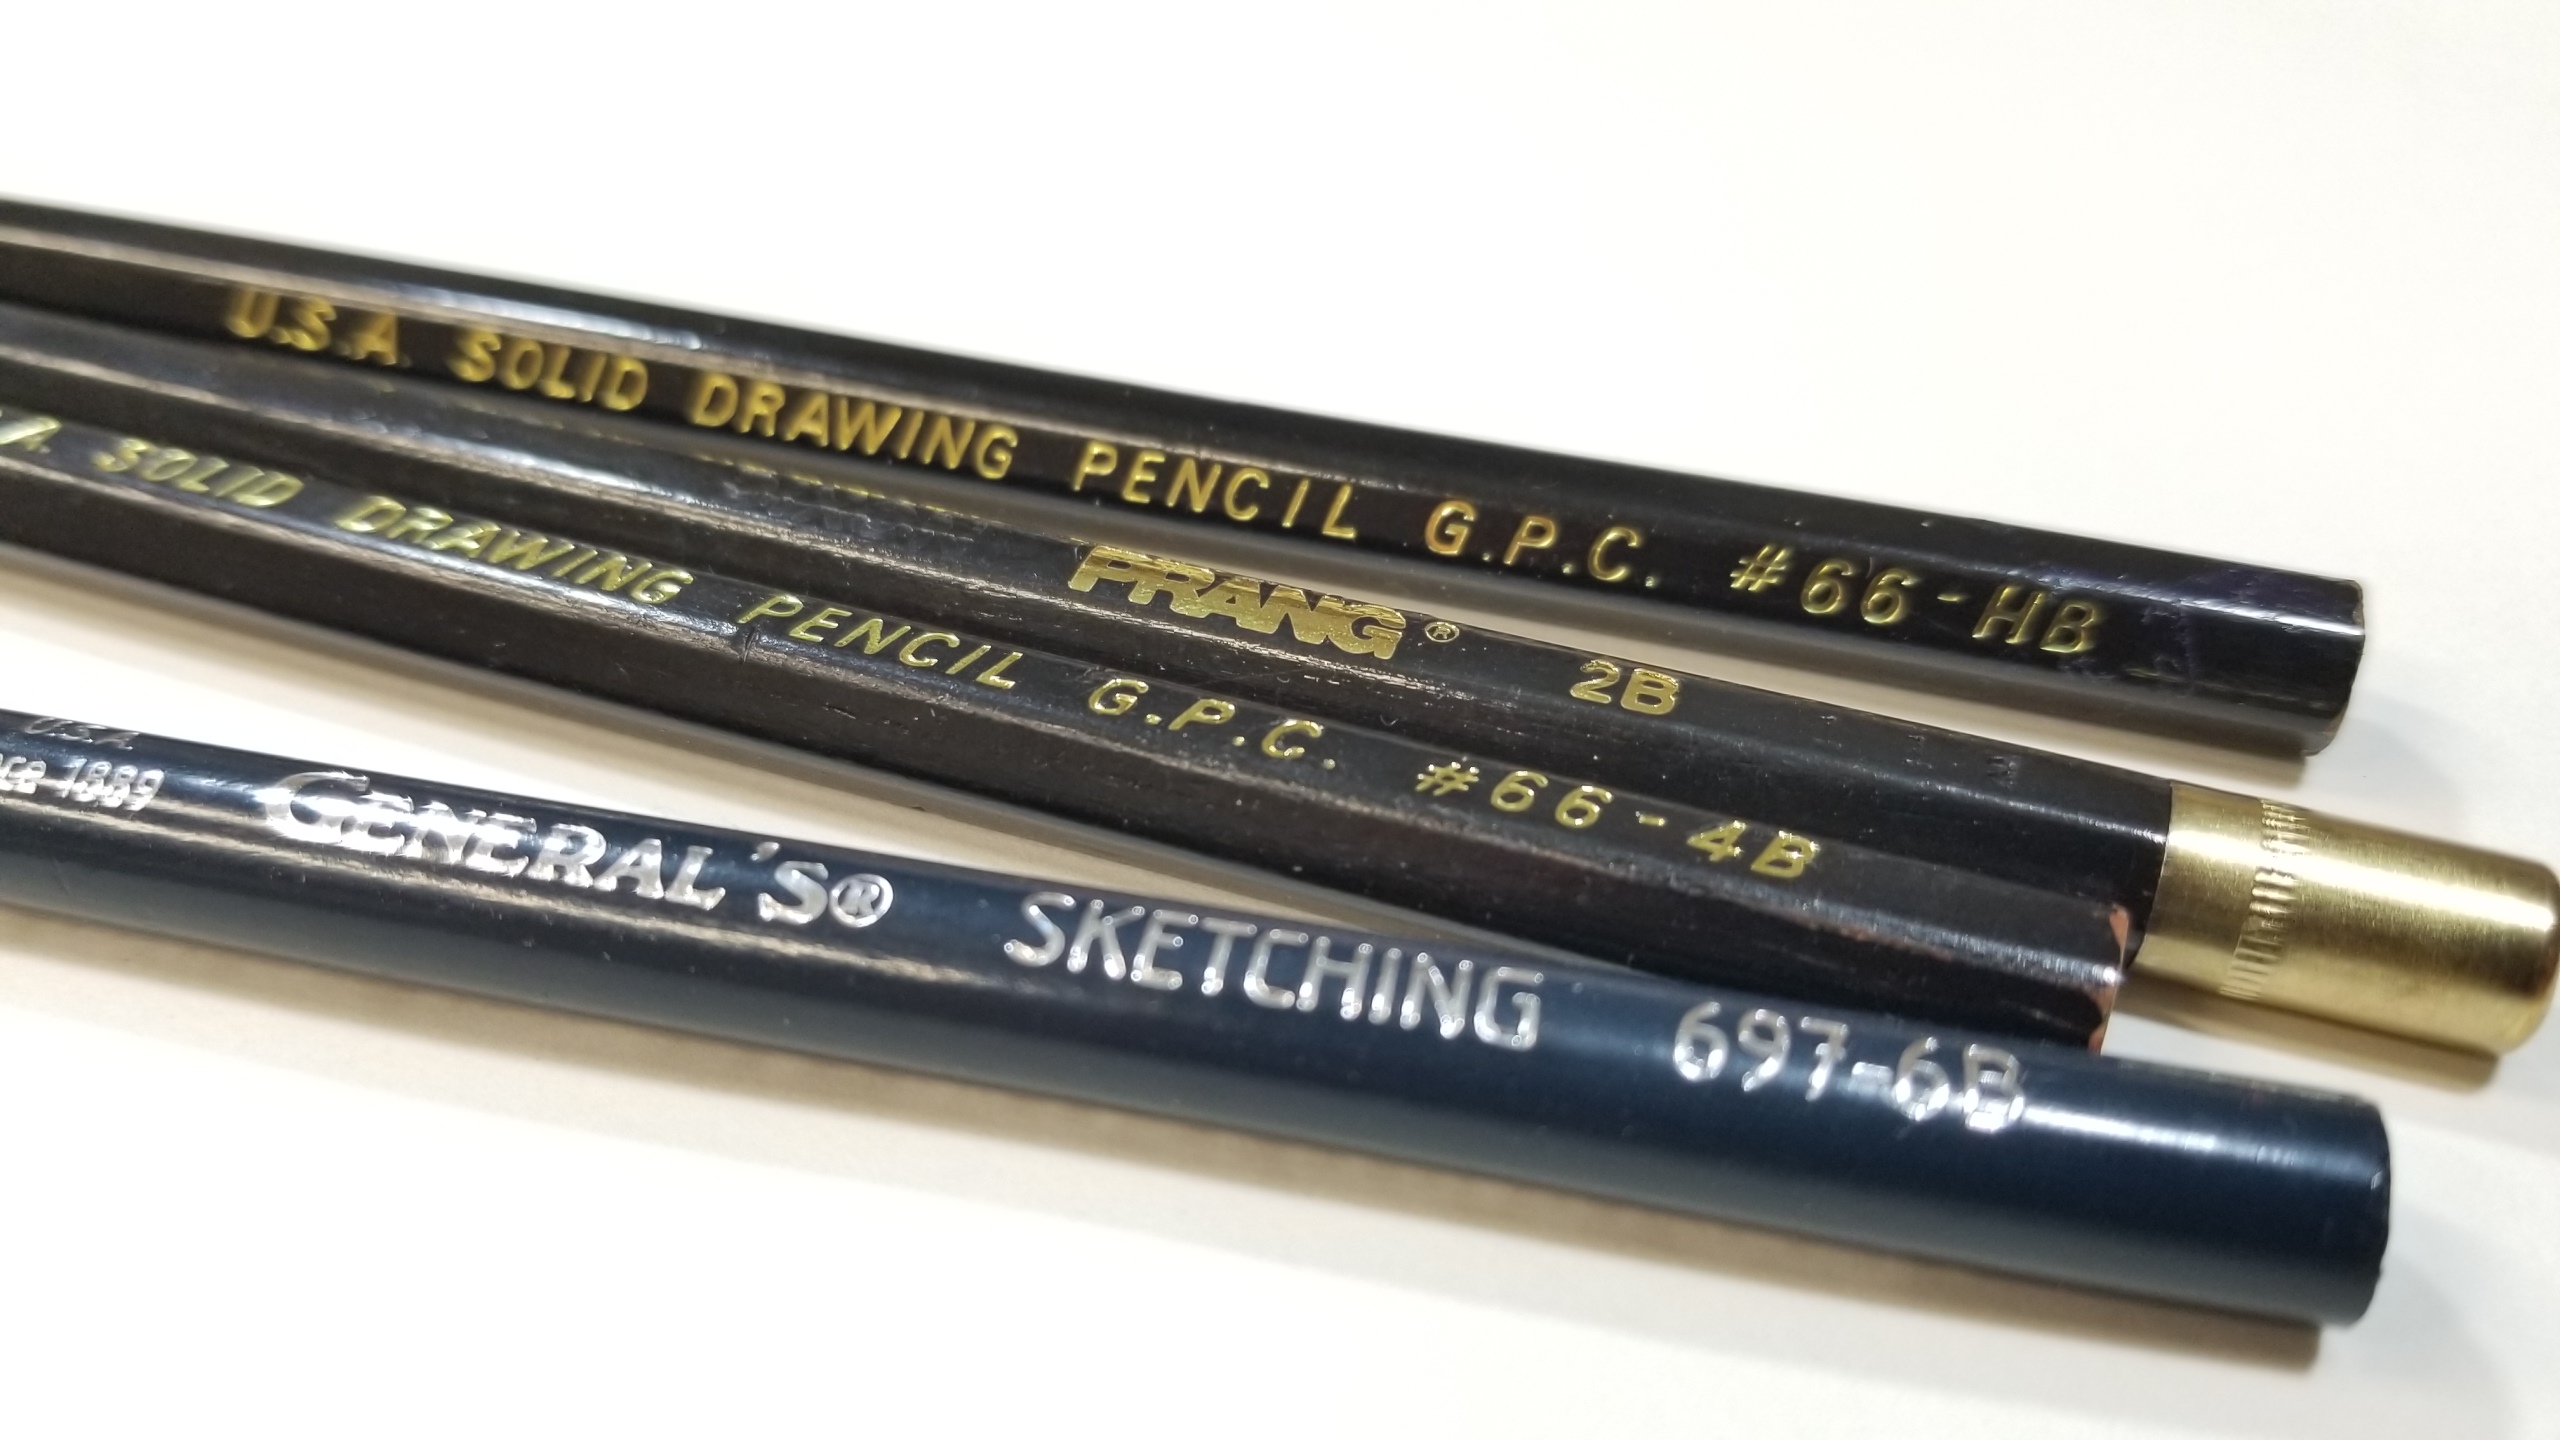
Here are some basic tools to get you started sketching. Brand quality isn’t super important in your sketching pencils. I use a variety with my students, Prang, General’s, Blick – whatever is convenient and on sale when I need to replenish my studio supply. What you do want is a few different lead types. For the most part, you can get all you need done with just an HB, 2B, 4B, and 6B. (We’ll talk more about those below.) Sets will usually come with a nice range, so you don’t really have to put too much thought into which ones to get to start out. You may want to later experiment with more variety like F and H. But I’m getting ahead of myself again, we’ll get to pencil lead at the end.
Don’t skip on the drawing board purchase! I know you might have a nice, smooth table to draw on but you still need a drawing board. Why? Because of perspective. When you draw flat on a table you are looking at your paper at a fairly sharp angle, then you hold up your picture (or put it on the wall) and the viewpoint is suddenly shifted. You can end up with a lot of distortion which is not a problem with your skill but with your position.
Below is an 18″ x 24″ drawing board with attached clips (it also has a handle cutout). You can also build your own with a piece of masonite from a home improvement store and a couple of bulldog clips. (You can see a 3″ bulldog clip in the image below.)
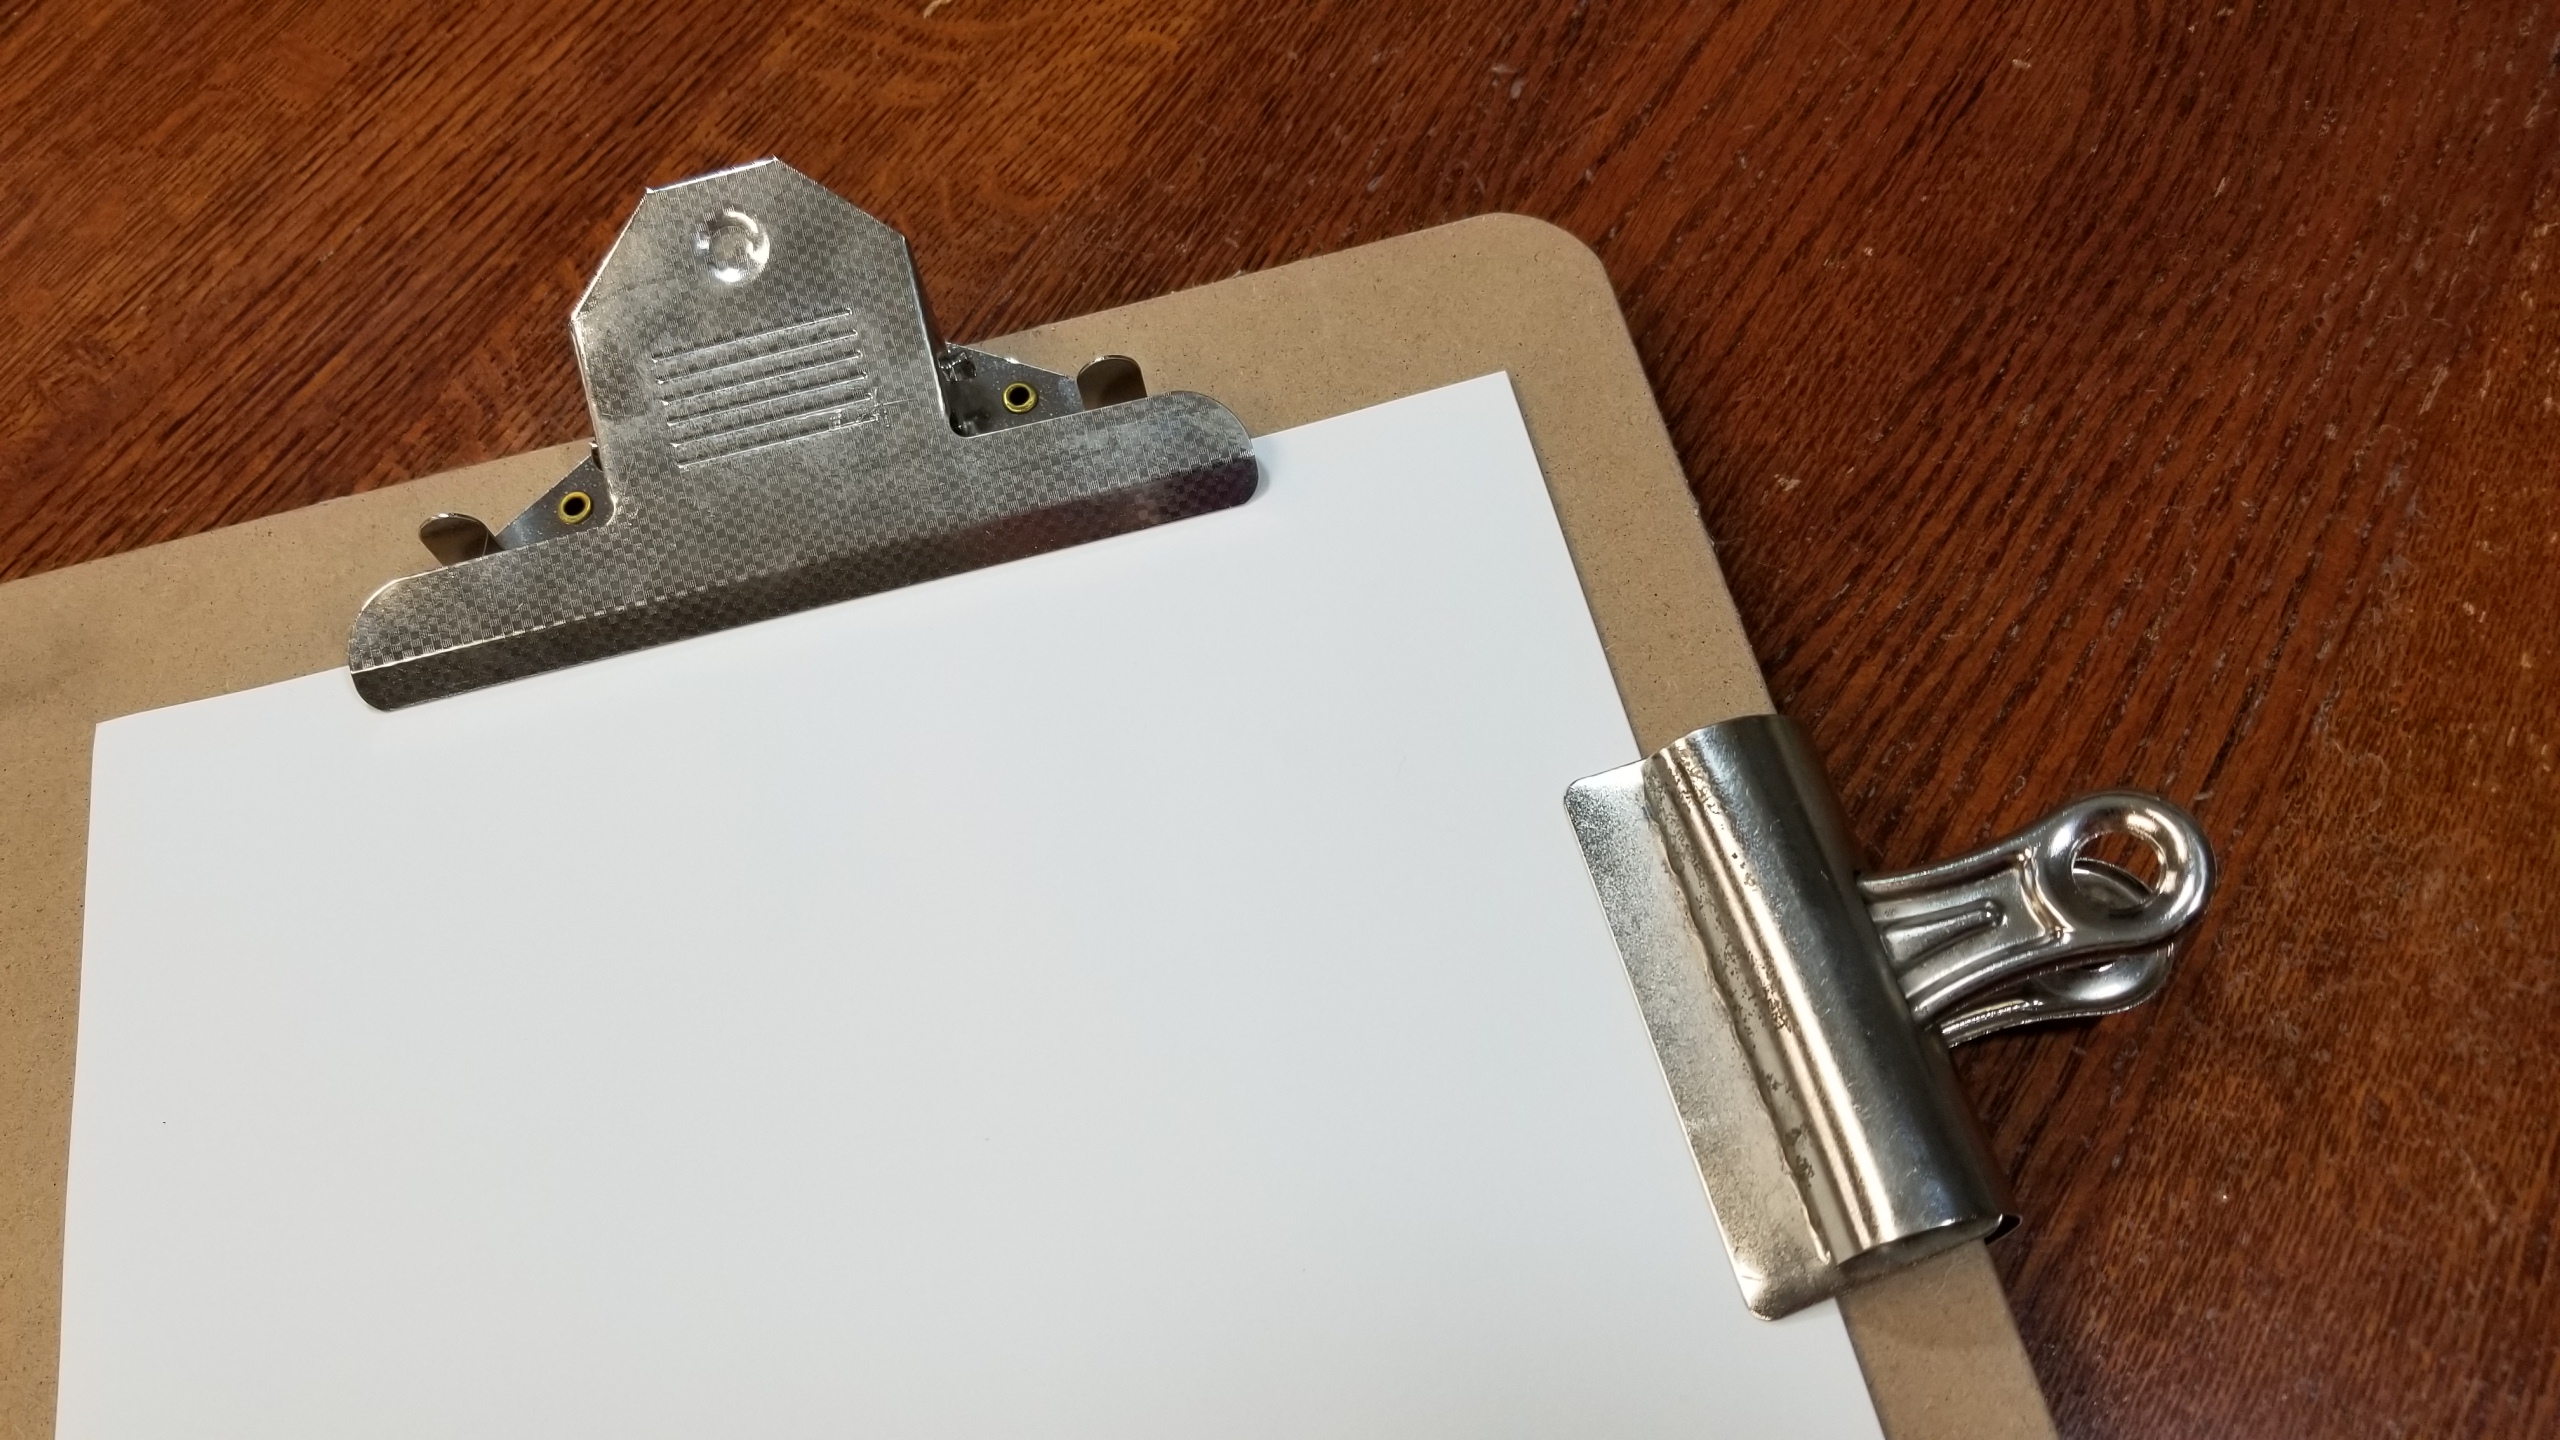
You’ll want a nice, smooth eraser too. Test it out to make sure it doesn’t leave behind any smudges or tear the paper.
I also like to use a big mop brush for flicking off the eraser crumbs. This is the best way to clean off your paper without risking any damage to a delicate drawing. If you brush off the eraser remains with your hand you may smudge your drawing and if you blow it off, well, it might get wet.

Now more about the pencils. Pencils are made with a mixture of graphite and clay. The ratio determines how hard or soft the lead is. A 6B pencil is softer and will have more graphite and less clay, a 6H pencil is harder and will have less graphite and more clay. A soft pencil will get you a thicker, darker line while a hard pencil will be thinner and sharper. Pencils on the B side will also be more shiny than the Hs.
So how do you use these pencils? The quick study below shows how you might use a few of these pencils. First, I sketched out a basic cone and cube shape using the 2B pencil. 2B is easy to erase and light. Works well for laying down some shapes. (I would also use this pencil to start a watercolor painting.)
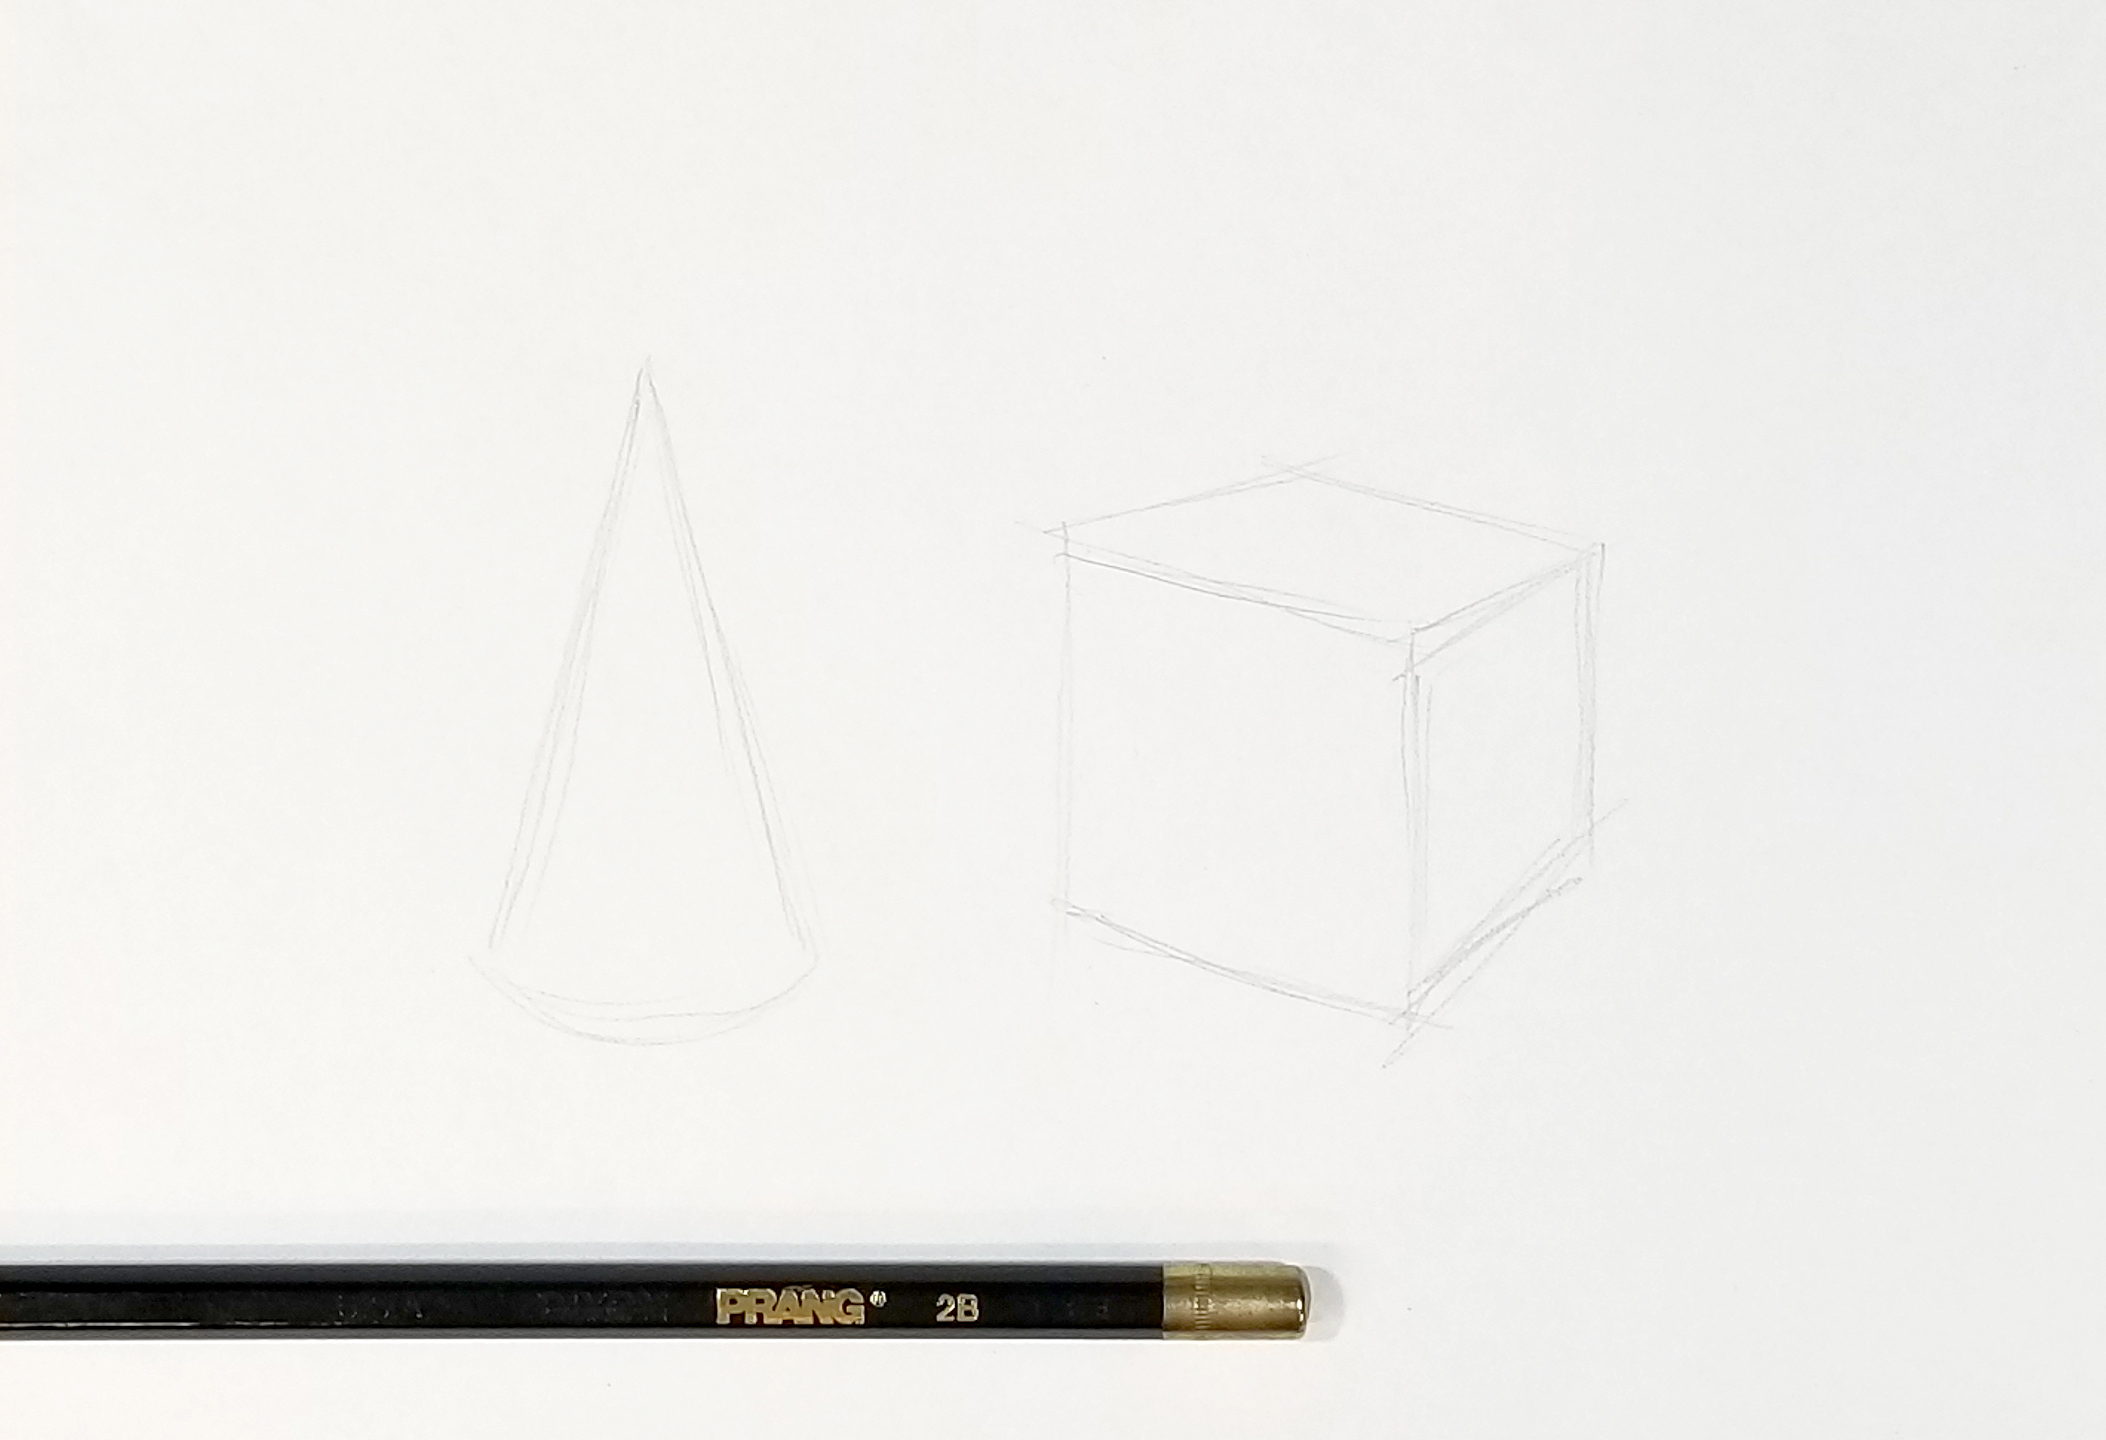


I switched to the 3B to start building up some mid-toned shadows. I used the 5B and 6B to layer some darker areas. Then I used an HB to draw some light, thin outlines and again the 5B and 6B to build darker shadow tones.
In a refined drawing I would keep going with blending, smoothing, adding layers to darken the darkest areas, and finish the cast shadows.
These tools will help you get started in your drawing practice. Don’t worry about what brands you are using as you are just starting out, just draw, draw, draw!
